
Create a scene
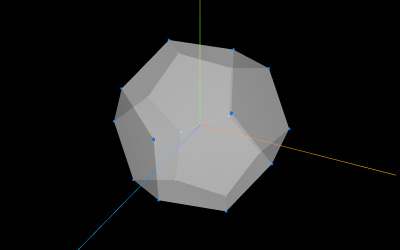
Think of Three.js like a film studio. To make a movie, you need three things: a stage, a camera, and a projector. In Three.js, those are the scene, the camera, and the renderer.
1. The Scene — your 3D world
The scene is just an empty container. Before you add anything to it, there's nothing — just black, empty space. Everything you create (objects, lights, models) goes inside it.
import * as THREE from 'three';

const scene = new THREE.Scene();
2. The Camera — your viewpoint
A camera in Three.js works like a real camera. It has a field of view (how wide it can see), an aspect ratio (width ÷ height), and near/far planes (how close and how far it can see).
const camera = new THREE.PerspectiveCamera(
    75, // field of view (degrees)
    window.innerWidth / window.innerHeight, // aspect ratio
    0.1, // near clipping plane
    1000, // far clipping plane
);
Don't worry too much about those numbers for now. Just know that the camera is what lets you see into your 3D world.
3. The Renderer — makes it visible
The renderer takes your scene and camera and draws pixels on the screen. Think of it as the projector that turns your 3D data into something you can actually see.
const renderer = new THREE.WebGLRenderer();
renderer.setSize(window.innerWidth, window.innerHeight);
document.body.appendChild(renderer.domElement);
The renderer.domElement is a canvas> element — Three.js creates it automatically and adds it to the page.
adding objects
Now let's put something in the scene — a green box.
const geometry = new THREE.BoxGeometry(1, 2, 3);
const material = new THREE.MeshStandardMaterial({ color: 0x00ff00 });
const cube = new THREE.Mesh(geometry, material);
scene.add(cube);
Every visible object in Three.js is made of three parts:
| Part | What it is |
|---|---|
| Geometry | The shape — just points in space |
| Material | The surface — color, texture, shine |
| Mesh | Geometry + material combined |
Three.js comes with lots of built-in geometries:
Don't worry about memorizing them — you'll pick them up as you go.
actually seeing something — the animation loop
You've built a world, placed a camera, added an object, and connected a projector. But nothing renders by itself. You need a loop that keeps drawing frame after frame:
function animate() {
    renderer.render(scene, camera);
    requestAnimationFrame(animate);
}
animate();
- This runs roughly 60 times per second (matching your monitor's refresh rate).
- Every frame, it takes a fresh picture of the scene and shows it on the canvas.
- Anything that moves or changes needs to go inside this function.
making things move
A static cube isn't very interesting. Let's spin it:
function animate(time) {
    cube.rotation.x = time / 2000; // spin around the X axis (slow)
    cube.rotation.y = time / 1000; // spin around the Y axis (faster)

    renderer.render(scene, camera);
}
The time parameter is automatically passed by requestAnimationFrame — it's the number of milliseconds since the page loaded. Dividing it by a number controls the speed.
full example
Here's everything put together in one file:
import * as THREE from 'three';

// ---- Setup ----
const scene = new THREE.Scene();
const camera = new THREE.PerspectiveCamera(
    75,
    window.innerWidth / window.innerHeight,
    0.1,
    1000,
);
const renderer = new THREE.WebGLRenderer();
renderer.setSize(window.innerWidth, window.innerHeight);
document.body.appendChild(renderer.domElement);

// ---- Object ----
const geometry = new THREE.BoxGeometry(1, 1, 1);
const material = new THREE.MeshBasicMaterial({ color: 0x00ff00 });
const cube = new THREE.Mesh(geometry, material);
scene.add(cube);

// Move the camera back so we can see the cube
camera.position.z = 5;

// ---- Animation loop ----
function animate(time) {
    cube.rotation.x = time / 2000;
    cube.rotation.y = time / 1000;
    renderer.render(scene, camera);
    requestAnimationFrame(animate);
}
animate();
Copy that into your main.js, open the HTML file in a browser, and you should see a spinning green cube. You've just made your first 3D scene!